Thursday 23 September 2010

Kitchen front Ginger Cake: Recipe.

As well as having a passion for cooking I have a fascination with the second world war.

I used to love my Nana telling me her stories of the war: I love the fashion, have studied the art of the time and the war time spirit has me gripped.

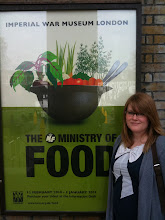
You can imagine my delight then when the Imperial War Museum opened the doors to it's latest temporary exhibition "The ministry of Food" (see the picture in my profile)

We visited The IWM show in February half term and it is wonderful, I urge you to go if you get the opportunity, it's on until the 3rd of January 2011.

I duly bought the book that accompanies the exhibition and promptly became too busy to cook anything from it - some of the recipes are less enticing than others however I was reminded of my desire to try some war time cooking when the October 2010 issue of Good Food landed on my door mat containing a recipe for the ginger cake Company of Cooks are selling at the Imperial War museum cafe.

I have made it once and it is stunning. I was surprised that there is as much cinnamon as ginger in the cake, and rather a lot of syrup but don't let that put you off!

I am going to try making the cake again this weekend using oil instead of margarine so my little lactose intolerant friend can try a slice - I'll report back on the results.

Kitchen Front Ginger Cake
Cuts into 14-16 slices - hey, families were larger in the 1940's, right?!

Ingredients
  • 300g margarine
  • 400g Golden Syrup
  • 1 egg, beaten
  • 130g Plain Flour
  • 225 Self Raising flour
  • 1 rounded Tsp of Ground ginger
  • 1 rounded Tsp of Cinnamon
  • A pinch of salt
  • 110g soft dark brown sugar
  • 1.5 tsp bicarbonate of soda
  • 175ml warm water

Method
  1. Heat the oven to 150 oC, line a 26cm cake tin.
  2. Gently melt the margarine and syrup in a pan.
  3. Place the flours, ginger, cinnamon, salt and sugar in a bowl or food mixer.
  4. Add the margarine and syrup to the dry mix and stir well, then add the egg.
  5. Disolve the bicarb in the warm water, then pour into the mixture, stirring continuously.
  6. Pour the mixture into the tin and smooth the top.
  7. Bake for 1 hour, a skewer inserted into the middle should come out clean. If not; cook for a further 5 minutes and re-try. This can be repeated until done.
  8. Turn out onto a cake rack to cool.
Enjoy!

PS - this post is dedicated to Lucy K who is full of blitz spirit. x

Teriyaki Chicken with egg-fried rice: Recipe

It's not often that I use "ready mades" or "cheat" products in the kitchen however a long, hard, day at work can make them a necessity.

I found this recipe for Teriyaki Chicken with Egg fried rice in the August 2010 edition of Delicious magazine and have made it at least 6 times - once for a large dinner party - and every time it's been complimented on its great flavours, colours and textures and is a quick, hearty and impressive dish.

This recipe uses pre-cooked basmati rice (I use the Tilda pouches) but I'm sure you could boil or steam rice if you have the inclination or the luxury of time.

Teriyaki chicken with egg-fried rice
Serves 2

Ingredients
  • 2 skinless chicken breasts, flattened slightly with a rolling pin.
  • 3 tbsp teriyaki marinade
  • 2 tbsp sesame oil
  • 250g Rice (I use Tilda Steamed Pure Basmati Rice)
  • 4 spring onions, finely chopped
  • 75g Frozen petit pois, defrosted
  • 50g roasted peppers in oil, drained and chopped or 1 fresh red pepper, diced.
  • 1 tbsp soy sauce
  • 1 large egg
  • Lime wedges to serve.

Method
  1. Place the chicken breasts in a bowl and coat in the teriyaki marinade and 1 tbsp of the sesame oil, cover and leave in the fridge for up to 20 mins.
  2. Heet a wok witht the remaining 1 tbsp of sesame oil. If using a fresh pepper stir fry it for a couple of minutes.
  3. Add the cooked rice to the wok and stir fry for 4 minutes.
  4. Heat a griddle pan or frying pan and cook the chicken on each side for 3-4 minutes or until cooked through.
  5. Add the spring onions, peas, roasted peppers (if using) and soy sauce to the rice and cook for a further 2 minutes.
  6. Add the egg to the rice and stir quickly to ensure that it scrambles through the rice.
  7. Serve the chicken on top of a pile of egg fried rice with a squeeze of lime juice over the top.
Quick, simple and delicious!
Enjoy!

Wednesday 22 September 2010

Best Banana Bread: Recipe

I've been ill for the past couple of weeks but luckily whilst I was still well I knocked up one of my favourite banana bread loafs. It is a great recipe for using up browning bananas and is perfect as an on the go breakfast, a slice of mid afternoon snack or with a little cream or ice cream as a pudding. The cake also keeps really well if stored in an airtight container it can last up to a week so is a good investment to make on a sunday afternoon.... just don't expect there to be any left by Wednesday!

I have tried adding chocolate chunks instead of the nuts or leaving them out all together and it works equally well each way - it just depends what you have in your cupboards!

Best Banana Bread

Ingredients
  • 225 Self-raising white flour
  • 1/4 tsp bicarbonate of soda
  • 1/2 tsp salt
  • 75g Butter
  • 150g Caster sugar
  • 450g Ripe bananas
  • 2 Eggs
  • Optional - 125g chopped mixted nuts or Chocolate
  • Extra sugar for sprinkling on top.
Method
  1. Line a 1lb loaf tin with non stick baking parchment
  2. Pre heat the oven to 180 oC / 170 oC Fan ovens.
  3. Sift the flour, Bicarbonate of soda and salt together in a bowl.
  4. Rub in the butter then stir in the sugar.
  5. Mash the bananas then add them to the flour mixture with the eggs and chopped nuts / chocolate if using.
  6. Turn the mixture into the lined tin and sprinkle the top with sugar.
  7. Bake in the oven for 1- 1.25 hours or until a skewer inserted into the centre comes out clean.
  8. Leave in the tin to cool for 10 minutes, then transfer to a cooling rack to cool completely.
Enjoy!

Oat and Raisin Cookies: Recipe

I made this recipe as a healthier version of the much loved cookie, the occasion was a healthy eating and practical skills session I ran for some children from the local primary schools visiting our Village college for the day to "try out big school"

The oil is a healthier alternative to butter, Wholemeal flour replaces half of the less fibre-rich plain flour and the sugar content was reduced whilst the amount of raisins was increased whilst the taste and quality of the cookie have not been affected!

The cookies are lovely and fudgey whilst containing some healthy ingredients so indulging in them isn't so sinful, they have been enjoyed by adults and kids alike and are also suitable for dairy intolerant people. They really are hard to resist and incredibly more-ish!

The list of ingredients may seem a little long but stick with it, this recipe gives good results.

Makes roughly 12 cookies although the ingredients can be easily multiplied.

Oat and Raisin Cookies

Ingredients
  • 80g Wholemeal flour
  • 80g Plain white flour
  • 1 teaspoon of baking powder
  • 75ml Vegetable oil
  • 75g dark brown sugar (muscavado)
  • 7g Caster sugar
  • 1 egg
  • 1 teaspoon Vanilla Extract or Vanilla Flavour
  • 50g Rolled oats
  • 85g Raisins.

Method
  1. Pre heat the oven to 170 0c.
  2. Put both sugars in a mixing bowl and mash to remove any lumps.
  3. Add the vegetable oil, the vanilla extract and the egg to the sugars and whisk to remove any more lumps.
  4. Add the oats and raisins to the mix and stir with a wooden spoon to combine.
  5. Add the wholemeal flour to the mix and stir until combined.
  6. Add the baking powder and stir again.
  7. Add the plain flour a little at a time and stir until the mixture forms a soft dough.
  8. To form the cookies: ake 2 teaspoons of dough and roll them into a ball, place the dough balls onto a lined baking tray, leaving a gap between them.
  9. Bake in the oven for 16 minutes, rotating the tray half way through to give an even colour.
  10. Remove the cookies and cool on the tray for a few minutes until they have firmed a little and are easy to handle.
  11. Transfer the cookies to a cooling rack to cool completely.
Enjoy!

Review: Afternoon Tea at the Hilton Doubletrees, Cambridge.

In July, to celebrate my mums' birthday we went for afternoon tea at the Hilon Doubletrees hotel.

We dined in style and in a way in which my mother has taught me to do things: on a half price voucher deal (afternoon tea for 2 = £15 reduced from £30)

There were 3 of us, who had eaten nothing since brunch so we ordered 2 afternoon teas which turned out to be a bit over ambitious.


The afternoon tea came with delicate finger sandwiches; egg and cress, smoked salmon and ham and mustard but that was the extent of the savoury.
There were creme brulees and mini trifles, eaton mess, scones, jam and clotted cream and themed Biscuits dipped in chocolate. The picture above shows biscuit shoes, a dress and handbag, The picture below has biscuits in the shape of a bear and a slice of chocolate rocky road cake.

We washed it all down with lashings of early greay tea and soon began to suffer with a sugar head ache due to the very low savoury to sweet ratio!

It was a really nice treat and next time we'll know to order 1 tea between 3 people and stock up on sandwiches or pork pies first! Although it may be a little out of my price range without the voucher their offer is available until October 2010 with a coupon in Explorer magazine.


Ruth and her Everest

The Blue Egg

You know when you say something as a joke and it backfires? Well, that was the blue egg.

We were having a drink at the delightful Cambridge Blue on Gwydir Street when my friend joined us.
"I'm going to the bar" He says "Can I get you anything?"
I look at the bar and see a giant jar of pickled eggs which had been dyed blue "A blue egg!" I chuckle. Seems the joke was on me though.

Here it is in all it's disgusting glory:

There is a very good reason why most food isn't blue.
*shudder*

It's been a while...

Courgettes in the green house

I realise that is a gross understatement as it's actually been over 6 months since I updated this blog. Its been a very busy time: Moving house and planting up our new grden, planning our wedding, working hard and travelling the globe during the summer so there is lots to write up about. Consider this a bloggers IOU.

I'll start close to (our new) home:

The Kitchen Garden.
We moved in early June and have spent a large amount of time turning the overgrown scrub land at the back of the house into a tamed place to grow vegetables. So far we have eaten tomatoes and courgettes that we've grown and today I had some freshly picked lettuce in my lunch time sandwich.
Plants waiting to be put in the bed.
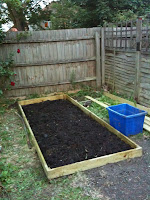
The first of 3 veg beds.


We raided the 2 grow bags of potatoes which hadn't been worked to their potential so only yielded a small quantitiy of spuds but they were tasty none the less and not at all disappointing as it's rewarding having grown anything, no matter how small!

This is all unbelievably exciting for 2 people who have spent the past few years in a first floor flat looking longingly at other peoples gardens. So much so that weeding still feels novel, although I'm not sure how much longer that'll last!

We already have sage growing in the garden along with one head of rhubarb that I'm very excited to see if it grows. We brought a few pots with us from the old flat: Chillis from Wahaca and some herbs: Rosemary, Bay and

Most of the veg that we planted will mature ready for late autumn or early winter with the exception of 2 aubergines the size of ping pong balls and a tiny green pepper that'll need eating before the month is out.

We've got a way to go before we're completely self sufficient but when the days become shorter we'll start to harvest the Brussel sprouts, leeks, Cabbage, Broccoli, Kale, Cauliflower and swede from the garden and in due course I'll post up some recipes for them too.