Showing posts with label Baking. Show all posts

Thursday, 23 September 2010

Kitchen front Ginger Cake: Recipe.

As well as having a passion for cooking I have a fascination with the second world war.

I used to love my Nana telling me her stories of the war: I love the fashion, have studied the art of the time and the war time spirit has me gripped.

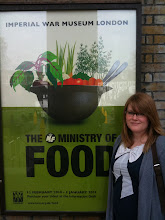
You can imagine my delight then when the Imperial War Museum opened the doors to it's latest temporary exhibition "The ministry of Food" (see the picture in my profile)

We visited The IWM show in February half term and it is wonderful, I urge you to go if you get the opportunity, it's on until the 3rd of January 2011.

I duly bought the book that accompanies the exhibition and promptly became too busy to cook anything from it - some of the recipes are less enticing than others however I was reminded of my desire to try some war time cooking when the October 2010 issue of Good Food landed on my door mat containing a recipe for the ginger cake Company of Cooks are selling at the Imperial War museum cafe.

I have made it once and it is stunning. I was surprised that there is as much cinnamon as ginger in the cake, and rather a lot of syrup but don't let that put you off!

I am going to try making the cake again this weekend using oil instead of margarine so my little lactose intolerant friend can try a slice - I'll report back on the results.

Kitchen Front Ginger Cake
Cuts into 14-16 slices - hey, families were larger in the 1940's, right?!

Ingredients
  • 300g margarine
  • 400g Golden Syrup
  • 1 egg, beaten
  • 130g Plain Flour
  • 225 Self Raising flour
  • 1 rounded Tsp of Ground ginger
  • 1 rounded Tsp of Cinnamon
  • A pinch of salt
  • 110g soft dark brown sugar
  • 1.5 tsp bicarbonate of soda
  • 175ml warm water

Method
  1. Heat the oven to 150 oC, line a 26cm cake tin.
  2. Gently melt the margarine and syrup in a pan.
  3. Place the flours, ginger, cinnamon, salt and sugar in a bowl or food mixer.
  4. Add the margarine and syrup to the dry mix and stir well, then add the egg.
  5. Disolve the bicarb in the warm water, then pour into the mixture, stirring continuously.
  6. Pour the mixture into the tin and smooth the top.
  7. Bake for 1 hour, a skewer inserted into the middle should come out clean. If not; cook for a further 5 minutes and re-try. This can be repeated until done.
  8. Turn out onto a cake rack to cool.
Enjoy!

PS - this post is dedicated to Lucy K who is full of blitz spirit. x

Wednesday, 22 September 2010

Best Banana Bread: Recipe

I've been ill for the past couple of weeks but luckily whilst I was still well I knocked up one of my favourite banana bread loafs. It is a great recipe for using up browning bananas and is perfect as an on the go breakfast, a slice of mid afternoon snack or with a little cream or ice cream as a pudding. The cake also keeps really well if stored in an airtight container it can last up to a week so is a good investment to make on a sunday afternoon.... just don't expect there to be any left by Wednesday!

I have tried adding chocolate chunks instead of the nuts or leaving them out all together and it works equally well each way - it just depends what you have in your cupboards!

Best Banana Bread

Ingredients
  • 225 Self-raising white flour
  • 1/4 tsp bicarbonate of soda
  • 1/2 tsp salt
  • 75g Butter
  • 150g Caster sugar
  • 450g Ripe bananas
  • 2 Eggs
  • Optional - 125g chopped mixted nuts or Chocolate
  • Extra sugar for sprinkling on top.
Method
  1. Line a 1lb loaf tin with non stick baking parchment
  2. Pre heat the oven to 180 oC / 170 oC Fan ovens.
  3. Sift the flour, Bicarbonate of soda and salt together in a bowl.
  4. Rub in the butter then stir in the sugar.
  5. Mash the bananas then add them to the flour mixture with the eggs and chopped nuts / chocolate if using.
  6. Turn the mixture into the lined tin and sprinkle the top with sugar.
  7. Bake in the oven for 1- 1.25 hours or until a skewer inserted into the centre comes out clean.
  8. Leave in the tin to cool for 10 minutes, then transfer to a cooling rack to cool completely.
Enjoy!

Oat and Raisin Cookies: Recipe

I made this recipe as a healthier version of the much loved cookie, the occasion was a healthy eating and practical skills session I ran for some children from the local primary schools visiting our Village college for the day to "try out big school"

The oil is a healthier alternative to butter, Wholemeal flour replaces half of the less fibre-rich plain flour and the sugar content was reduced whilst the amount of raisins was increased whilst the taste and quality of the cookie have not been affected!

The cookies are lovely and fudgey whilst containing some healthy ingredients so indulging in them isn't so sinful, they have been enjoyed by adults and kids alike and are also suitable for dairy intolerant people. They really are hard to resist and incredibly more-ish!

The list of ingredients may seem a little long but stick with it, this recipe gives good results.

Makes roughly 12 cookies although the ingredients can be easily multiplied.

Oat and Raisin Cookies

Ingredients
  • 80g Wholemeal flour
  • 80g Plain white flour
  • 1 teaspoon of baking powder
  • 75ml Vegetable oil
  • 75g dark brown sugar (muscavado)
  • 7g Caster sugar
  • 1 egg
  • 1 teaspoon Vanilla Extract or Vanilla Flavour
  • 50g Rolled oats
  • 85g Raisins.

Method
  1. Pre heat the oven to 170 0c.
  2. Put both sugars in a mixing bowl and mash to remove any lumps.
  3. Add the vegetable oil, the vanilla extract and the egg to the sugars and whisk to remove any more lumps.
  4. Add the oats and raisins to the mix and stir with a wooden spoon to combine.
  5. Add the wholemeal flour to the mix and stir until combined.
  6. Add the baking powder and stir again.
  7. Add the plain flour a little at a time and stir until the mixture forms a soft dough.
  8. To form the cookies: ake 2 teaspoons of dough and roll them into a ball, place the dough balls onto a lined baking tray, leaving a gap between them.
  9. Bake in the oven for 16 minutes, rotating the tray half way through to give an even colour.
  10. Remove the cookies and cool on the tray for a few minutes until they have firmed a little and are easy to handle.
  11. Transfer the cookies to a cooling rack to cool completely.
Enjoy!

Monday, 29 March 2010

Chocolate Mayonnaise Cake: Recipe

About 10 years ago, whilst I was at sixth form college a girl in my class brought in a gorgeously moist looking chocolate cake (think Bruce Bogtrotter) boasting that it was made with mayonnaise.

Ever since then I've been meaning to make one of my own and so, in the quest for dairy free treats for my lactose intolerant lovely, I made one this weekend.

I searched for a recipe and found a promising looking one on the eco friendly website www.lovefoodhatewaste.com

Whilst making it I had some reservations, mainly about the hideously off-putting tuna mayo-esque stench of what is usually an irresisstable chocolatey goo (Are you trying to tell me you don't eat half the chocolate cake mix before it even makes it in to the tin?) But the final cake turned out so lush that it's well worth holding your nose and thinking of tea time.... and you've well and truly earned a slice after beating the mayo into the mix so hard you develop new arm muscles....

I accidentally added an extra teaspoon of the coffee granules to the icing which wasn't a disaster, it just added a nice dark mocha element to the cake.

I hope you enjoy it....

Chocolate Cake recipe from by Caroline Marson at www.lovefoodhatewaste.com

Makes a 18cm cake

  • 275g self raising flour
  • 225g caster sugar
  • 1½ teaspoons baking powder
  • 200g jar of mayonnaise
  • 4 tablespoons cocoa powder
  • 225ml boiling water
  • 1 teaspoon vanilla essence
For the icing:
  • 2 level teaspoons instant coffee
  • 2 level tablespoons cocoa powder
  • 2 tablespoons warm water
  • 75g butter
  • 225g icing sugar

Instructions

  1. Preheat the oven to 180°C (350°F) mark 4. Line an 18 cm cake tin with greaseproof paper.
  2. Sift the flour into a large mixing bowl and stir in the caster sugar and baking powder. Beat the mayonnaise well into the flour – it is very important to beat thoroughly into the dry ingredients.
  3. Dissolve the cocoa in the boiling water and stir this gently until it’s smooth. Add to the flour mixture with the vanilla essence and give it a quick stir. Stir everything thoroughly until all the ingredients are blended but this time don’t beat the mixture because that will spoil it. Just keep stirring it gently until all the lumps are gone.
  4. Pour the cake mixture into the tin. Bake for about an hour or until the center feels springy and a skewer comes out clean. Leave the cake in the tin to cool before turning out onto a wire rack.
  5. For the topping, dissolve 2 teaspoons of coffee and 2 tablespoons of cocoa in 2 tablespoons of hot water. Add the soft butter and the icing sugar.
  6. Beat the mixture thoroughly ensuring there are no lumps and spread it over the cake.